- Reduce Bounce Rate
- Control Desk
How to use the Link Finder in Control Desk to make pages findable via search terms
With Link Finder, you can redirect search terms to specific pages or highlight a link on the search results page. This is because your online shoppers are not only looking for products via the search function, but also for informative pages. That's why Link Finder lets you optimize the service for your online shoppers by redirecting them to service pages, campaign pages, or brand pages, or by drawing their attention to them. In this blog post, you'll learn about the options available when creating Link Finder and the use cases for which it is useful.

Here's what you can expect to find in this blog article:
Create a Link Finder entry
Step 1: Define search term and target URL
Step 2: Select link type
What is a link finder?
The Link Finder is a feature of the "Search" service in the Control Desk. With the Link Finder, you can activate a redirect to a predefined page (target URL) of your online shop for a specific search term. This allows you to ensure that pages that are not included in your product catalog for search are also found via the search function.
Redirects using Link Finder are useful for service pages, such as
- Payment methods,
- Legal notice or
- Delivery times.
You can also link to a brand page or campaign page by creating a link finder entry.
Stay up to date on personalization: Sign up for the Epoq newsletter: Register now!
Create Link Finder entry
You can find the Link Finder function in the Control Desk under "Search" in the "Features" section. You can create a redirect using the "Create entry" button.
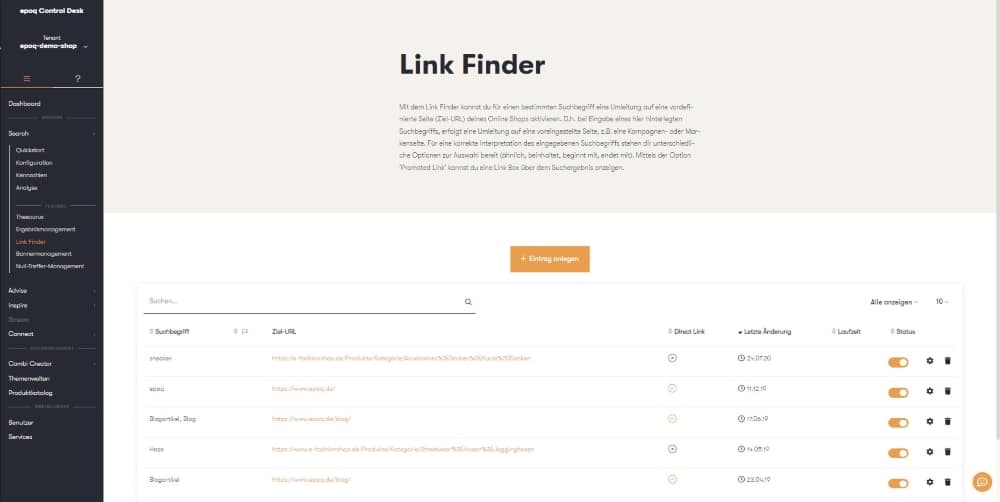
Path to the Link Finder in Control Desk
Step 1: Define the search term and target URL
First, you specify the search term for which the redirection is to be performed. Using the available options, you can specify how the search term should be interpreted. If you do not select anything, the "exact" option is used by default. However, this entry only applies if the search term is searched for on its own and consists exclusively of exactly these letters. But you also have other options:
- Similar: Include related and similar search terms for executing the redirection.
- includes: Include search terms that contain the specified search term.
- begins with: Include search terms that begin with the specified search term.
- ends with: Include search terms that end with the specified search term.
Then you specify the target URL to which the redirection should be made. With the date entry "Valid from," you can also set a start and end date for the redirection. If you work with country codes, you can select the country code for which the entry should be displayed.
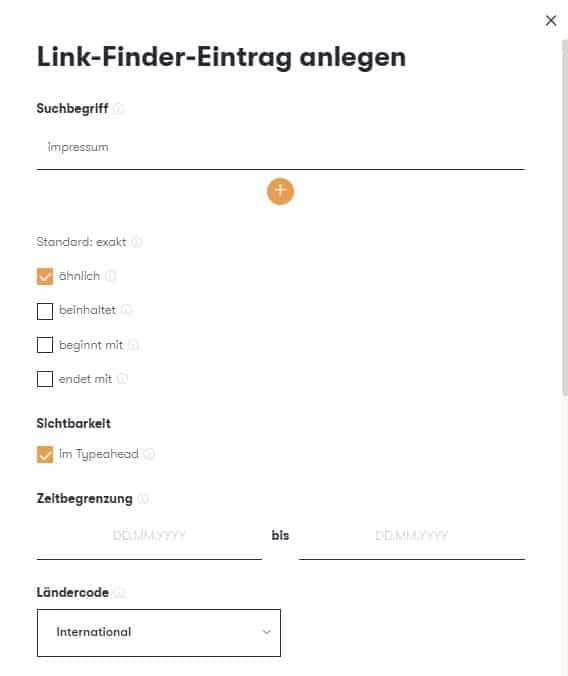
Editing the Link Finder entry
Step 2: Select link type
Redirects can be created as direct links or promoted links:
- Direct Link: This option redirects directly to the entered target URL.
- Promoted Link: This option displays a link box above the search terms.
Direct links are mainly used for service pages such as legal notices, delivery times, payment methods, and brand pages. When you enter a search term in the search box and then trigger the search, you are redirected directly to the target URL.
Example of a direct link:
By analyzing zero-hit searches, you discover that your online shoppers frequently search for "repair." You have a separate page where you describe the procedure for repairing products in detail. To ensure that your online shoppers land on this page when searching for the term "repair" in the future, you create a direct link for the search term repair.
Tip:
In the Analytics section of Epoq Search (Control Desk), you’ll find the “zero-hit” searches. This section often lists search terms for which information is available in the online store but cannot be found. This is often because the information in question does not pertain to a product. If your list includes such search terms, you can switch directly from the Analytics section to the Link Finder and create an entry. It is therefore worth checking the Epoq Search analytics section regularly.
If you do not want direct redirection, the link with the stored data (title, description, headline, image, button, etc.) can also be displayed as a link box above the search results (promoted link). Clicking on the link then redirects you to another page. A promoted link is useful if you want to find both information and products for a search term.
Example of a promoted link:
You offer ski-related products in your shop, from ski clothing to ski equipment. To show your online shoppers the complete product range in your ski category, you have created a landing page. You are already promoting the landing page through various channels and now want it to be found via search. You therefore create a promoted link for the search term "ski." Online shoppers searching for skis will see a link to your landing page above the search results for skis.
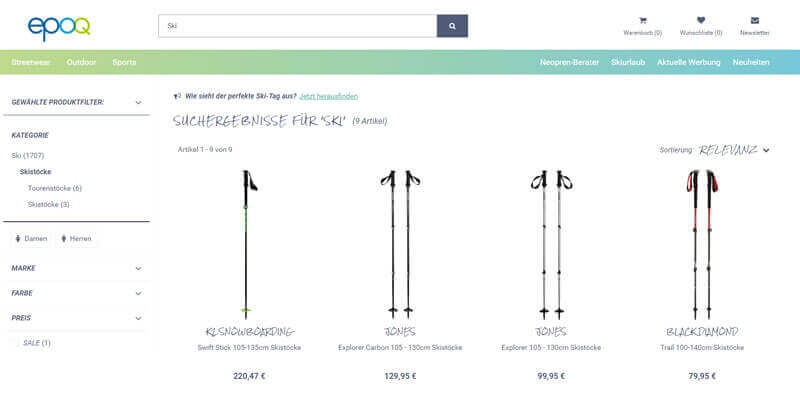
Promoted Link in Epoq Control Desk
Stay up to date on personalization: Sign up for the Epoq newsletter: Register now!
Conclusion: Service optimization made easy
The Link Finder in Control Desk offers you a quick and effective way to make informative pages in your online shop searchable using search terms or to highlight them. With just a few clicks, you can create a Link Finder entry and optimize the service for your online shoppers. You can also use the results of a zero-hit search to create Link Finder entries directly.
Increase your personalization success
Do you have any questions or need help with optimization? Our Customer Success Team will be happy to assist you.

Log in to your Control Desk now and start optimizing. Don't have Control Desk access yet? You can request your account here » Request Control Desk account

Anne-Katharina Frank
Customer Success ConsultantYou are currently viewing placeholder content from HubSpot Embedded Content. To access the actual content, click the button below. Please note that doing so will result in data being shared with third-party providers.
More InformationYou are currently viewing placeholder content from HubSpot. To access the actual content, click the button below. Please note that doing so will result in data being shared with third-party providers.
More InformationYou are currently viewing placeholder content from HubSpot Meetings. To access the actual content, click the button below. Please note that doing so will result in data being shared with third-party providers.
More Information